This is an old revision of the document!
Table of Contents
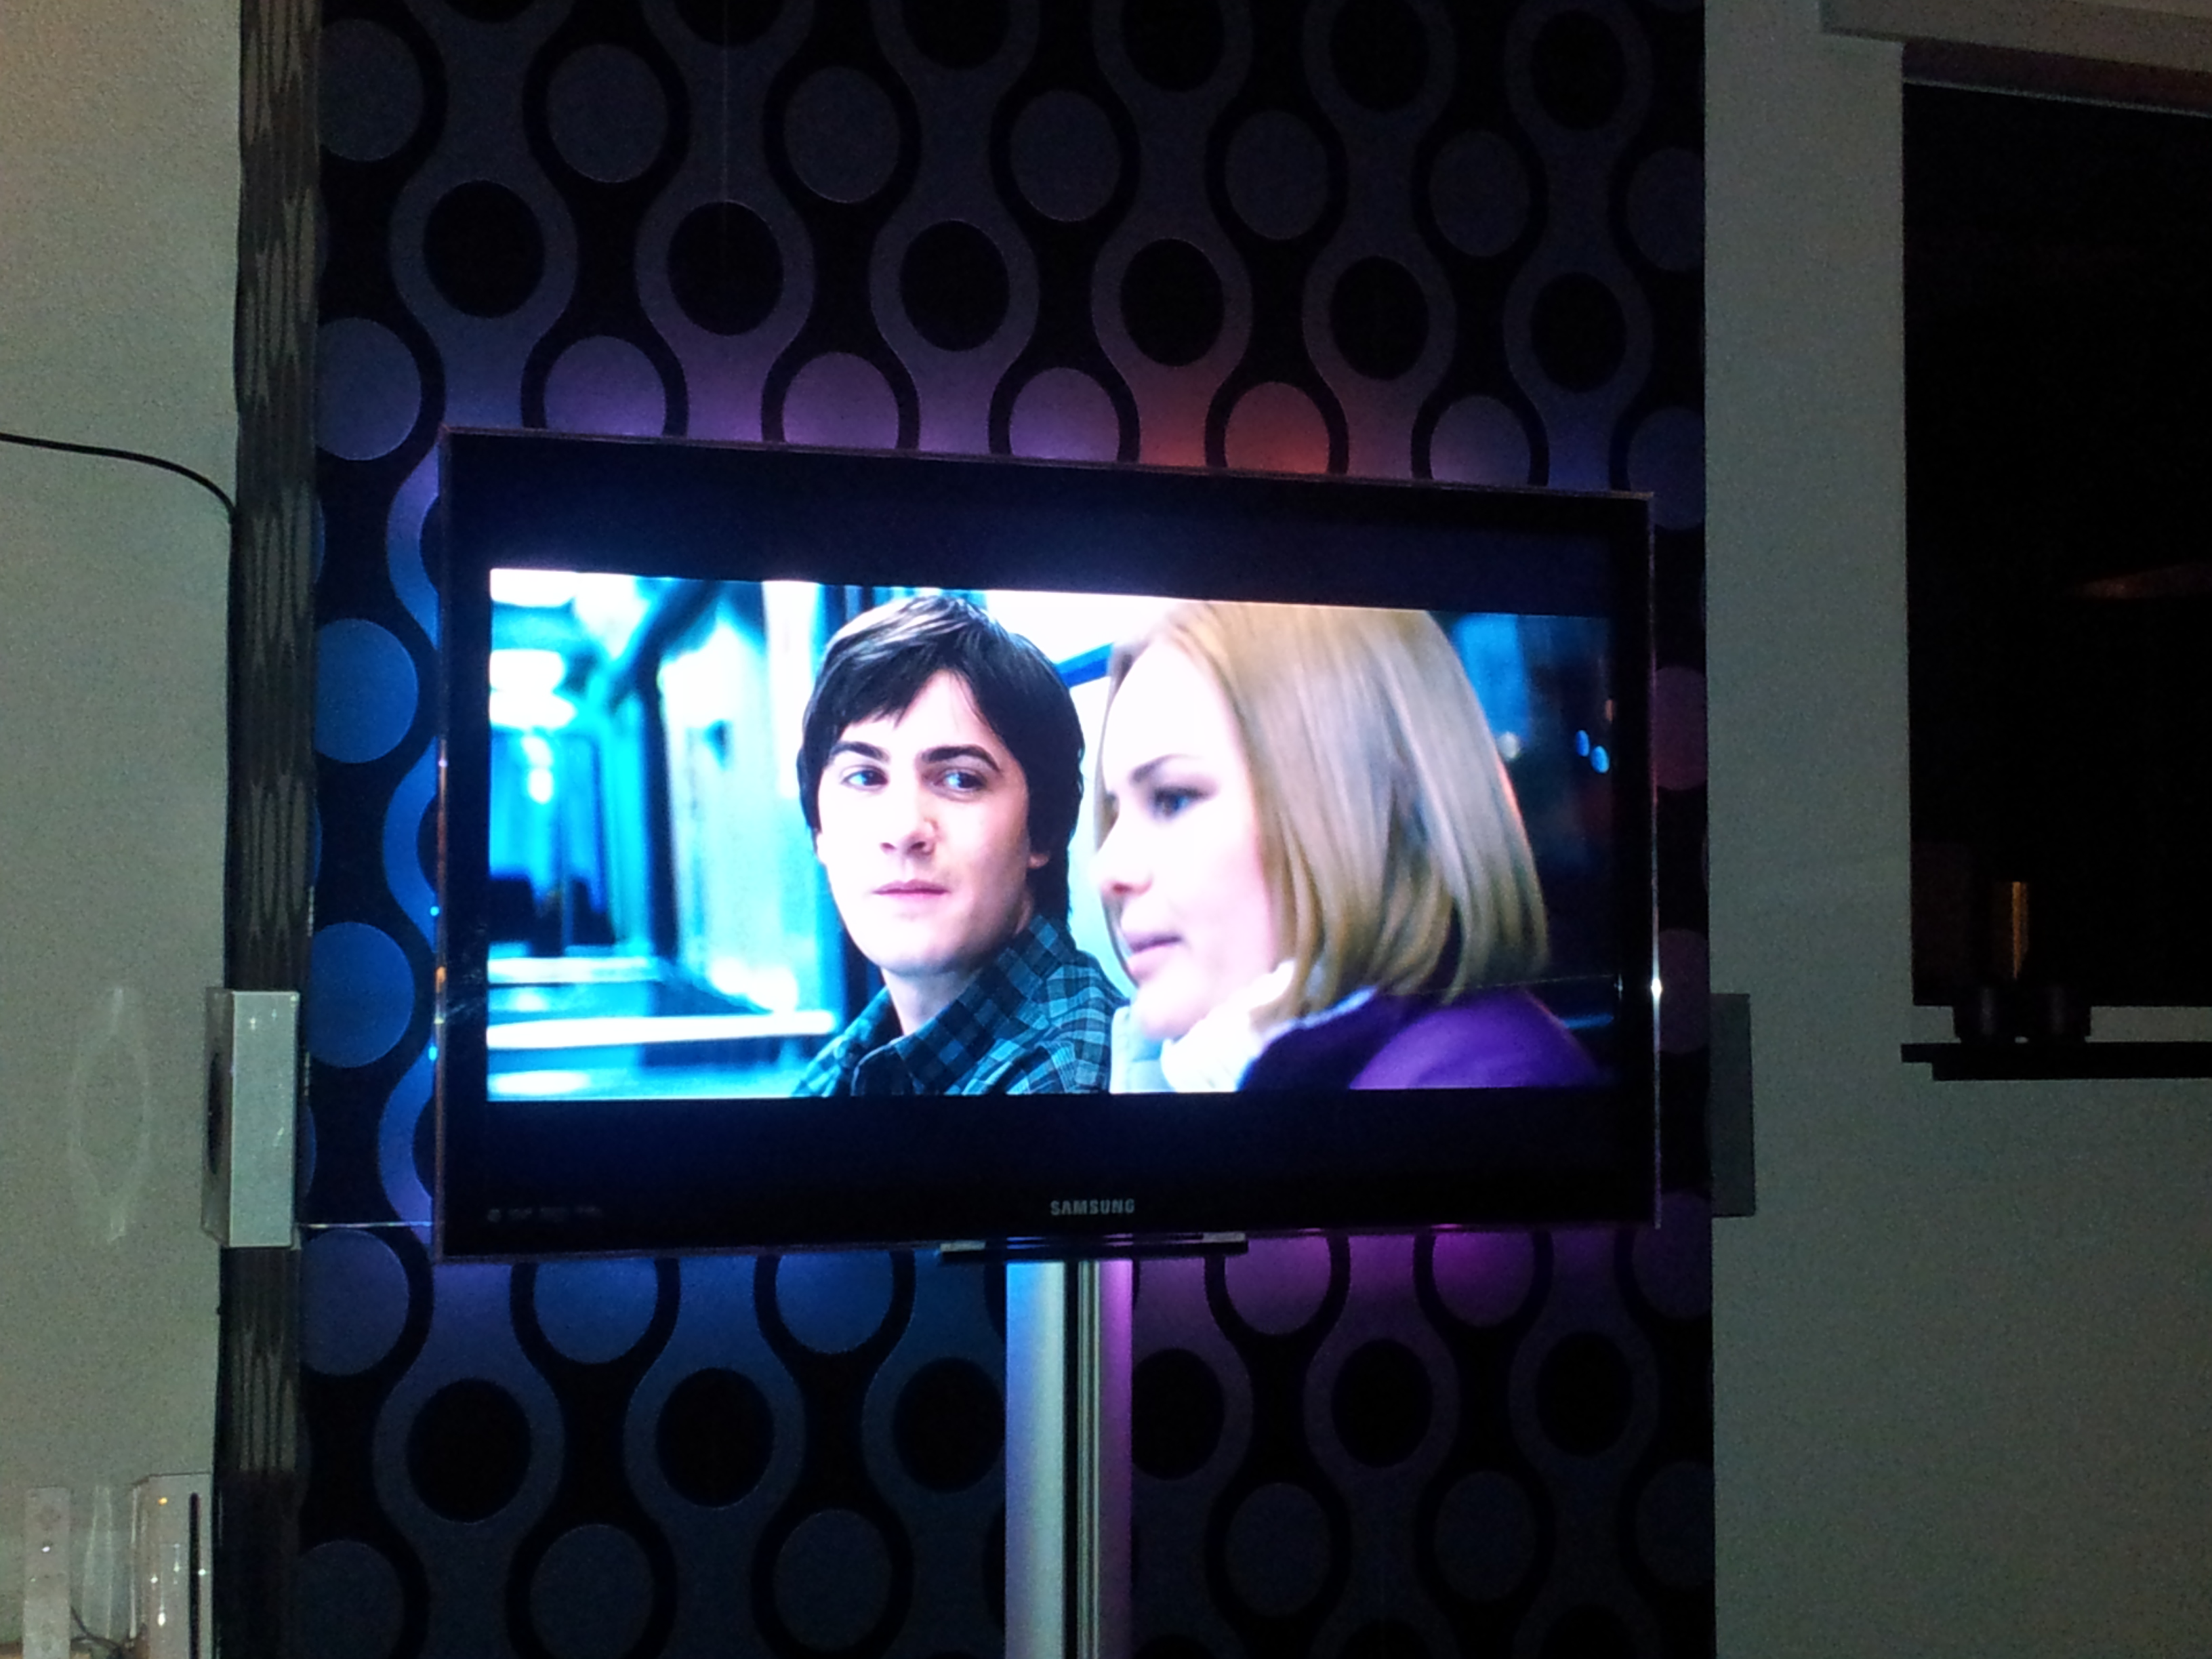
Ambilight clone
Onder XBMC is het erg makkelijk om met een arduno en een digitale RGD ledstring een ambilight clone te maken, met heel aardig resultaat.
Onderdelen lijst
- Arduino Uno
- RGB ledstring
- 5 volt 1A voeding (+/- 1A per 25 leds)
- Ubuntu met XBMC en de boblight plugin
Hardware
Wat betreft de hardware is het vrij simpel vanaf de ledstring gaat de
- gnd naar de gnd van de arduino en de gnd van de adapter
- +5 naar de +5 van de adapter
- Serial data naar pin 11 op de arduno
- Serial Clock naar pin 13 op de arduno
vervolgens moet je ledstream.pde flashen naar je arduno, deze is hier te downloaden
ter referentie hier ook de code zelf
- LEDstream.pde
// Arduino "bridge" code between host computer and WS2801-based digital
// RGB LED pixels (e.g. Adafruit product ID #322).  Intended for use
// with USB-native boards such as Teensy or Adafruit 32u4 Breakout;
// works on normal serial Arduinos, but throughput is severely limited.
// LED data is streamed, not buffered, making this suitable for larger
// installations (e.g. video wall, etc.) than could otherwise be held
// in the Arduino's limited RAM.

// Some effort is put into avoiding buffer underruns (where the output
// side becomes starved of data).  The WS2801 latch protocol, being
// delay-based, could be inadvertently triggered if the USB bus or CPU
// is swamped with other tasks.  This code buffers incoming serial data
// and introduces intentional pauses if there's a threat of the buffer
// draining prematurely.  The cost of this complexity is somewhat
// reduced throughput, the gain is that most visual glitches are
// avoided (though ultimately a function of the load on the USB bus and
// host CPU, and out of our control).

// LED data and clock lines are connected to the Arduino's SPI output.
// On traditional Arduino boards, SPI data out is digital pin 11 and
// clock is digital pin 13.  On both Teensy and the 32u4 Breakout,
// data out is pin B2, clock is B1.  LEDs should be externally
// powered -- trying to run any more than just a few off the Arduino's
// 5V line is generally a Bad Idea.  LED ground should also be
// connected to Arduino ground.

#include <SPI.h>

// LED pin for Adafruit 32u4 Breakout Board:
//#define LED_DDR  DDRE
//#define LED_PORT PORTE
//#define LED_PIN  _BV(PORTE6)
// LED pin for Teensy:
//#define LED_DDR  DDRD
//#define LED_PORT PORTD
//#define LED_PIN  _BV(PORTD6)
// LED pin for Arduino:
#define LED_DDR  DDRB
#define LED_PORT PORTB
#define LED_PIN  _BV(PORTB5)

// A 'magic word' (along with LED count & checksum) precedes each block
// of LED data; this assists the microcontroller in syncing up with the
// host-side software and properly issuing the latch (host I/O is
// likely buffered, making usleep() unreliable for latch).  You may see
// an initial glitchy frame or two until the two come into alignment.
// The magic word can be whatever sequence you like, but each character
// should be unique, and frequent pixel values like 0 and 255 are
// avoided -- fewer false positives.  The host software will need to
// generate a compatible header: immediately following the magic word
// are three bytes: a 16-bit count of the number of LEDs (high byte
// first) followed by a simple checksum value (high byte XOR low byte
// XOR 0x55).  LED data follows, 3 bytes per LED, in order R, G, B,
// where 0 = off and 255 = max brightness.

static const uint8_t magic[] = {'A','d','a'};
#define MAGICSIZE  sizeof(magic)
#define HEADERSIZE (MAGICSIZE + 3)

#define MODE_HEADER 0
#define MODE_HOLD   1
#define MODE_DATA   2

// If no serial data is received for a while, the LEDs are shut off
// automatically.  This avoids the annoying "stuck pixel" look when
// quitting LED display programs on the host computer.
static const unsigned long serialTimeout = 15000; // 15 seconds

void setup()
{
  // Dirty trick: the circular buffer for serial data is 256 bytes,
  // and the "in" and "out" indices are unsigned 8-bit types -- this
  // much simplifies the cases where in/out need to "wrap around" the
  // beginning/end of the buffer.  Otherwise there'd be a ton of bit-
  // masking and/or conditional code every time one of these indices
  // needs to change, slowing things down tremendously.
  uint8_t
    buffer[256],
    indexIn       = 0,
    indexOut      = 0,
    mode          = MODE_HEADER,
    hi, lo, chk, i, spiFlag;
  int16_t
    bytesBuffered = 0,
    hold          = 0,
    c;
  int32_t
    bytesRemaining;
  unsigned long
    startTime,
    lastByteTime,
    lastAckTime,
    t;

  LED_DDR  |=  LED_PIN; // Enable output for LED
  LED_PORT &= ~LED_PIN; // LED off

  Serial.begin(115200); // Teensy/32u4 disregards baud rate; is OK!

  SPI.begin();
  SPI.setBitOrder(MSBFIRST);
  SPI.setDataMode(SPI_MODE0);
  SPI.setClockDivider(SPI_CLOCK_DIV8);  // 2 MHz
  // WS2801 datasheet recommends max SPI clock of 2 MHz, and 50 Ohm
  // resistors on SPI lines for impedance matching.  In practice and
  // at short distances, 2 MHz seemed to work reliably enough without
  // resistors, and 4 MHz was possible with a 220 Ohm resistor on the
  // SPI clock line only.  Your mileage may vary.  Experiment!
  // SPI.setClockDivider(SPI_CLOCK_DIV4);  // 4 MHz

  // Issue test pattern to LEDs on startup.  This helps verify that
  // wiring between the Arduino and LEDs is correct.  Not knowing the
  // actual number of LEDs connected, this sets all of them (well, up
  // to the first 25,000, so as not to be TOO time consuming) to red,
  // green, blue, then off.  Once you're confident everything is working
  // end-to-end, it's OK to comment this out and reprogram the Arduino.
  uint8_t testcolor[] = { 0, 0, 0, 255, 0, 0 };
  for(char n=3; n>=0; n--) {
    for(c=0; c<25000; c++) {
      for(i=0; i<3; i++) {
        for(SPDR = testcolor[n + i]; !(SPSR & _BV(SPIF)); );
      }
    }
    delay(1); // One millisecond pause = latch
  }

  Serial.print("Ada\n"); // Send ACK string to host

  startTime    = micros();
  lastByteTime = lastAckTime = millis();

  // loop() is avoided as even that small bit of function overhead
  // has a measurable impact on this code's overall throughput.

  for(;;) {

    // Implementation is a simple finite-state machine.
    // Regardless of mode, check for serial input each time:
    t = millis();
    if((bytesBuffered < 256) && ((c = Serial.read()) >= 0)) {
      buffer[indexIn++] = c;
      bytesBuffered++;
      lastByteTime = lastAckTime = t; // Reset timeout counters
    } else {
      // No data received.  If this persists, send an ACK packet
      // to host once every second to alert it to our presence.
      if((t - lastAckTime) > 1000) {
        Serial.print("Ada\n"); // Send ACK string to host
        lastAckTime = t; // Reset counter
      }
      // If no data received for an extended time, turn off all LEDs.
      if((t - lastByteTime) > serialTimeout) {
        for(c=0; c<32767; c++) {
          for(SPDR=0; !(SPSR & _BV(SPIF)); );
        }
        delay(1); // One millisecond pause = latch
        lastByteTime = t; // Reset counter
      }
    }

    switch(mode) {

     case MODE_HEADER:

      // In header-seeking mode.  Is there enough data to check?
      if(bytesBuffered >= HEADERSIZE) {
        // Indeed.  Check for a 'magic word' match.
        for(i=0; (i<MAGICSIZE) && (buffer[indexOut++] == magic[i++]););
        if(i == MAGICSIZE) {
          // Magic word matches.  Now how about the checksum?
          hi  = buffer[indexOut++];
          lo  = buffer[indexOut++];
          chk = buffer[indexOut++];
          if(chk == (hi ^ lo ^ 0x55)) {
            // Checksum looks valid.  Get 16-bit LED count, add 1
            // (# LEDs is always > 0) and multiply by 3 for R,G,B.
            bytesRemaining = 3L * (256L * (long)hi + (long)lo + 1L);
            bytesBuffered -= 3;
            spiFlag        = 0;         // No data out yet
            mode           = MODE_HOLD; // Proceed to latch wait mode
          } else {
            // Checksum didn't match; search resumes after magic word.
            indexOut  -= 3; // Rewind
          }
        } // else no header match.  Resume at first mismatched byte.
        bytesBuffered -= i;
      }
      break;

     case MODE_HOLD:

      // Ostensibly "waiting for the latch from the prior frame
      // to complete" mode, but may also revert to this mode when
      // underrun prevention necessitates a delay.

      if((micros() - startTime) < hold) break; // Still holding; keep buffering

      // Latch/delay complete.  Advance to data-issuing mode...
      LED_PORT &= ~LED_PIN;  // LED off
      mode      = MODE_DATA; // ...and fall through (no break):

     case MODE_DATA:

      while(spiFlag && !(SPSR & _BV(SPIF))); // Wait for prior byte
      if(bytesRemaining > 0) {
        if(bytesBuffered > 0) {
          SPDR = buffer[indexOut++];   // Issue next byte
          bytesBuffered--;
          bytesRemaining--;
          spiFlag = 1;
        }
        // If serial buffer is threatening to underrun, start
        // introducing progressively longer pauses to allow more
        // data to arrive (up to a point).
        if((bytesBuffered < 32) && (bytesRemaining > bytesBuffered)) {
          startTime = micros();
          hold      = 100 + (32 - bytesBuffered) * 10;
          mode      = MODE_HOLD;
	}
      } else {
        // End of data -- issue latch:
        startTime  = micros();
        hold       = 1000;        // Latch duration = 1000 uS
        LED_PORT  |= LED_PIN;     // LED on
        mode       = MODE_HEADER; // Begin next header search
      }
    } // end switch
  } // end for(;;)
}

void loop()
{
  // Not used.  See note in setup() function.
}
Software
packages uit de standaard ubuntu repo installeren
aptitude install libx11-dev libgl1-mesa-dev libxrender-dev libxext-dev portaudio19-dev libavcodec-dev libavformat-dev libswscale-dev libavdevice-dev
SVN-checkout van de boblight software en deze compilen
svn checkout http://boblight.googlecode.com/svn/trunk/ boblight

#compilen
cd boblight
./configure --without-opengl --without-portaudio
make
make install

#XBMC plugin fixen onder 64-bit ubuntu
ln -s /usr/local/lib/boblight.so /usr/lib/boblight.so
configuratie
vervolgens moet je een boblight config maken, het LED gedeelte kan je automagisch via deze link laten genereren.
Je krijgt dan het “Light” gedeelte uit de config en een plaatje hoe je de leds moet plaatsen.
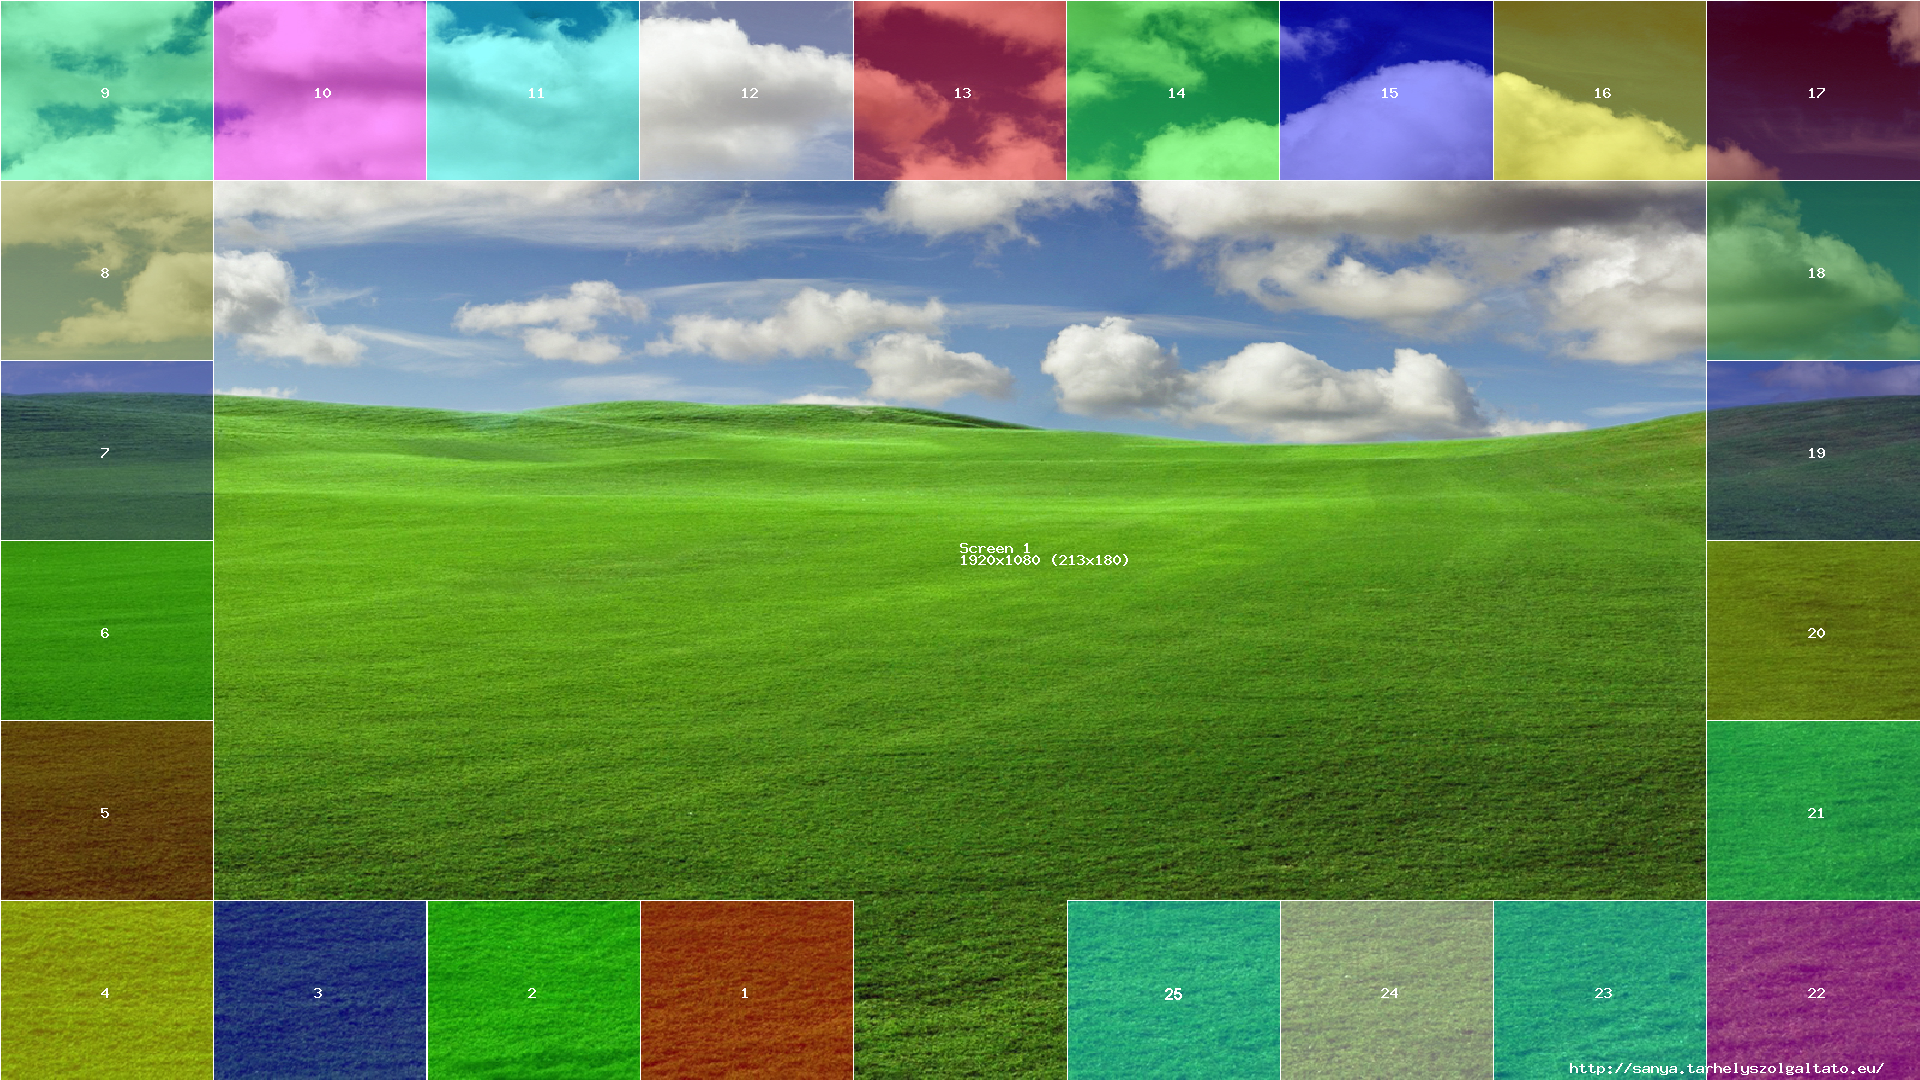
(voor 25 leds is deze config bruikbaar)
mcedit /etc/boblight.conf
zet hier de volgende code in :
- boblight.conf
#config file for adalight from http://www.ladyada.net/make/adalight/

[global]
interface 127.0.0.1
port      19333

[device]
name			ambilight
type			momo
output			/dev/ttyACM0
channels		75
prefix			41 64 61 00 18 4D
interval		10000
rate			115200
debug			off #turn this on to see what it's doing with the serial port
delayafteropen		1000000


[color]
name            red
rgb             FF0000

[color]
name            green
rgb             00FF00

[color]
name            blue
rgb             0000FF


[light]
name            1
color           red     ambilight 1
color           green   ambilight 2
color           blue    ambilight 3
hscan           33.33 44.44
vscan           83.33 100

[light]
name            2
color           red     ambilight 4
color           green   ambilight 5
color           blue    ambilight 6
hscan           22.24 33.35
vscan           83.33 100

[light]
name            3
color           red     ambilight 7
color           green   ambilight 8
color           blue    ambilight 9
hscan           11.09 22.2
vscan           83.33 100

[light]
name            4
color           red     ambilight 10
color           green   ambilight 11
color           blue    ambilight 12
hscan           0 11.11
vscan           83.33 100

[light]
name            5
color           red     ambilight 13
color           green   ambilight 14
color           blue    ambilight 15
hscan           0 11.11
vscan           66.67 83.33

[light]
name            6
color           red     ambilight 16
color           green   ambilight 17
color           blue    ambilight 18
hscan           0 11.11
vscan           50 66.67

[light]
name            7
color           red     ambilight 19
color           green   ambilight 20
color           blue    ambilight 21
hscan           0 11.11
vscan           33.33 50

[light]
name            8
color           red     ambilight 22
color           green   ambilight 23
color           blue    ambilight 24
hscan           0 11.11
vscan           16.67 33.33

[light]
name            9
color           red     ambilight 25
color           green   ambilight 26
color           blue    ambilight 27
hscan           0 11.11
vscan           0 16.67

[light]
name            10
color           red     ambilight 28
color           green   ambilight 29
color           blue    ambilight 30
hscan           11.11 22.22
vscan           0 16.67

[light]
name            11
color           red     ambilight 31
color           green   ambilight 32
color           blue    ambilight 33
hscan           22.22 33.33
vscan           0 16.67

[light]
name            12
color           red     ambilight 34
color           green   ambilight 35
color           blue    ambilight 36
hscan           33.33 44.44
vscan           0 16.67

[light]
name            13
color           red     ambilight 37
color           green   ambilight 38
color           blue    ambilight 39
hscan           44.44 55.55
vscan           0 16.67

[light]
name            14
color           red     ambilight 40
color           green   ambilight 41
color           blue    ambilight 42
hscan           55.55 66.67
vscan           0 16.67

[light]
name            15
color           red     ambilight 43
color           green   ambilight 44
color           blue    ambilight 45
hscan           66.67 77.78
vscan           0 16.67

[light]
name            16
color           red     ambilight 46
color           green   ambilight 47
color           blue    ambilight 48
hscan           77.78 88.89
vscan           0 16.67

[light]
name            17
color           red     ambilight 49
color           green   ambilight 50
color           blue    ambilight 51
hscan           88.89 100
vscan           0 16.67

[light]
name            18
color           red     ambilight 52
color           green   ambilight 53
color           blue    ambilight 54
hscan           88.89 100
vscan           16.67 33.33

[light]
name            19
color           red     ambilight 55
color           green   ambilight 56
color           blue    ambilight 57
hscan           88.89 100
vscan           33.33 50

[light]
name            20
color           red     ambilight 58
color           green   ambilight 59
color           blue    ambilight 60
hscan           88.89 100
vscan           50 66.67

[light]
name            21
color           red     ambilight 61
color           green   ambilight 62
color           blue    ambilight 63
hscan           88.89 100
vscan           66.67 83.33

[light]
name            22
color           red     ambilight 64
color           green   ambilight 65
color           blue    ambilight 66
hscan           88.89 100
vscan           83.33 100

[light]
name            23
color           red     ambilight 67
color           green   ambilight 68
color           blue    ambilight 69
hscan           77.78 88.89
vscan           83.33 100

[light]
name            24
color           red     ambilight 70
color           green   ambilight 71
color           blue    ambilight 72
hscan           66.67 77.78
vscan           83.33 100

[light]
name            25
color           red     ambilight 73
color           green   ambilight 74
color           blue    ambilight 75
hscan           55.55 66.67
vscan           83.33 100
Met de prefix bepaal je ook hoeveel leds je aanstuurd, gebruik dus altijd de juiste
Prefix for 25 LEDS: 41 64 61 00 18 4D
Prefix for 50 LEDS: 41 64 61 00 31 64
Prefix for 100 LEDS: 41 64 61 00 63 36
Autostart
uiteraard willen we het geheel automagisch starten.
mcedit /etc/init.d/boblight
zet hier het volgende in
- boblight
#!/bin/sh -e
### BEGIN INIT INFO
# Provides:          transmission-daemon
# Required-Start:    $local_fs $remote_fs $network
# Required-Stop:     $local_fs $remote_fs $network
# Default-Start:     2 3 4 5
# Default-Stop:      0 1 6
# Short-Description: Start or stop the transmission-daemon.
### END INIT INFO

. /lib/lsb/init-functions


start_daemon()
{
	/usr/local/bin/boblightd -f > /var/log/boblightd 2>&1
}

stop_daemon()
{
	killall boblightd
}


case "$1" in
    start)
        log_daemon_msg "Starting boblight daemon"
        start_daemon
        log_end_msg 0
        ;;
    stop)
        log_daemon_msg "Stopping boblight daemon"
        stop_daemon
        log_end_msg 0
        ;;
    restart|force-reload)
        log_daemon_msg "Restarting boblight daemon"
        stop_daemon
        start_daemon
        log_end_msg 0
        ;;
    *)
        echo "Usage: /etc/init.d/$NAME {start|stop|reload|force-reload|restart}"
        exit 2
        ;;
esac

exit 0
en laat deze automagisch starten
chmod +x /etc/init.d/boblight
update-rc.d boblight defaults